Are you a proud owner of an electric mountain bike? Whether you’re a newbie or a seasoned rider, taking proper care of your e-bike is crucial for a smooth and enjoyable journey. That’s where electrical troubleshooting comes into play. In this article, we’ll explore the importance of electrical troubleshooting for your electric mountain bike. By diagnosing and fixing common electrical issues, you’ll not only enhance the performance of your e-bike but also extend its lifespan. So, whether you use your e-bike for daily commuting, off-road adventures, or weekend jaunts, read on to discover the essential art of electrical troubleshooting.
The Importance of Electrical Troubleshooting for Your Electric Mountain Bike
Owning an electric mountain bike (e-bike) is an exciting and convenient way to explore the outdoors. The power and efficiency of an e-bike rely heavily on its electrical system, which makes electrical troubleshooting an essential part of responsible e-bike ownership. By understanding the importance of electrical troubleshooting and knowing how to prevent and address common electrical issues, you can ensure the safe and efficient operation of your e-bike while maximizing its lifespan.
Why Electrical Troubleshooting Is Necessary
Electrical troubleshooting is necessary to maintain the optimal performance of your e-bike and ensure your safety while riding. By identifying and resolving electrical issues, you can prevent more significant problems from arising and avoid costly repairs in the long run. Here are some key reasons why electrical troubleshooting is necessary:
Ensuring Safe and Efficient Operation
Your safety should always be the top priority when riding an e-bike. Faulty electrical systems can lead to malfunctions, such as sudden power loss, unresponsive brakes, or issues with the motor. By regularly troubleshooting the electrical components of your e-bike, you can identify potential safety hazards and address them promptly, ensuring a smooth and worry-free riding experience.
Maximizing Battery Life
The battery is a crucial component of your e-bike’s electrical system. A well-maintained and properly functioning battery not only provides longer riding distances but also extends the overall lifespan of your e-bike. By regularly testing and monitoring the battery’s voltage, capacity, and health, you can ensure it remains in optimal condition, maximizing its longevity and performance.
Avoiding Costly Repairs
Addressing electrical issues early on can help prevent more significant and expensive problems from occurring. By troubleshooting and resolving minor electrical problems promptly, you can save yourself from the inconvenience and financial burden of costly repairs or even the need to replace major components of your e-bike.
Enhancing Riding Experience
A properly functioning electrical system can greatly enhance your riding experience. By regularly troubleshooting and maintaining your e-bike’s electrical components, you can enjoy a smoother and more enjoyable ride, free from unexpected malfunctions or performance limitations.
Preventive Maintenance for Your E-Bike’s Electrical System
Preventive maintenance is key to keeping your e-bike’s electrical system in top shape. By following these simple practices, you can prevent potential electrical issues and ensure the longevity of your e-bike:
Regularly Inspecting Wiring and Connections
Inspecting the wiring and connections of your e-bike’s electrical system is crucial for identifying any loose or corroded connections. Check the wiring harness, connectors, and terminals for any signs of damage or wear. By resolving these issues promptly, you can prevent potential electrical malfunctions and ensure a reliable connection throughout your e-bike’s electrical system.
Cleaning and Protecting Electrical Components
Regularly cleaning and protecting your e-bike’s electrical components can prevent dirt, dust, and moisture from causing damage. Use a soft cloth or brush to remove any debris from the wiring, connectors, and battery terminals. Additionally, consider using electrical contact cleaner or silicone spray to protect the connections from corrosion and ensure optimal conductivity.
Properly Charging and Storing the Battery
Following proper charging and storage practices is essential for maintaining the health and performance of your e-bike’s battery. Always use the charger provided by the manufacturer and ensure it is compatible with your battery. Avoid overcharging or undercharging the battery, as this can lead to reduced capacity and overall health. When not in use, store the battery in a cool, dry place away from direct sunlight or extreme temperatures.
Identifying Electrical Issues
Being able to identify electrical issues is the first step in troubleshooting and resolving them. Here are some common signs of a faulty electrical system to watch out for:
- Sudden power loss during riding
- Dim or flickering lights on the display or controller
- Unresponsive or erratic motor behavior
- Inaccurate battery level readings
By paying attention to these signs and understanding the common electrical problems that can occur, you can quickly diagnose and address any issues that arise.
Tools and Equipment for Electrical Troubleshooting
Having the right tools and equipment for electrical troubleshooting is essential for effectively diagnosing and resolving electrical issues on your e-bike. Here are some tools that you should have in your toolkit:
Multimeter
A multimeter is a versatile tool that allows you to measure voltage, current, and resistance. It is invaluable for testing various electrical components, including the battery, wiring, connections, and motor.
Wire Snippers and Strippers
Wire snippers and strippers are essential for cutting and stripping wires during repairs or replacements. These tools ensure clean and precise cuts, maintaining the integrity of your e-bike’s electrical system.
Crimping Tool
A crimping tool is used to securely attach electrical connectors, terminals, and wire ends. It provides a reliable connection, minimizing the risk of loose or intermittent connections that can cause electrical issues.
Electrical Tape
Electrical tape is a must-have for insulating and protecting exposed wires, connections, or terminals. It helps prevent short circuits and ensures the longevity of your e-bike’s electrical system.
Soldering Iron
A soldering iron is useful for more advanced electrical repairs, such as soldering broken wires or replacing faulty components. It allows for a strong and reliable connection, ensuring proper electrical conductivity.
Understanding the E-Bike’s Electrical System
To effectively troubleshoot and maintain your e-bike’s electrical system, it’s important to have a basic understanding of its components, wiring diagrams, and electrical principles.
Components of the Electrical System
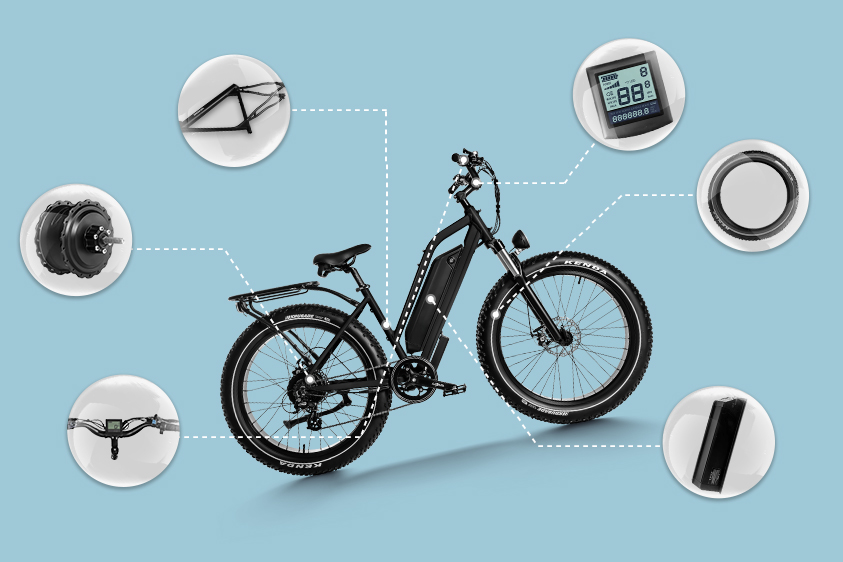
The main components of an e-bike’s electrical system include the battery, controller, motor, display, wiring harness, and various sensors. Each component plays a crucial role in the overall operation and performance of your e-bike.
E-Bike Wiring Diagrams
E-bike wiring diagrams provide a visual representation of the electrical connections and components within your e-bike. Understanding these diagrams allows you to trace wiring, identify potential issues, and make accurate repairs or replacements.
Understanding Voltage and Current
Voltage and current are essential electrical concepts to understand when troubleshooting your e-bike. Voltage refers to the electrical potential difference between two points, while current is the flow of electrons through a circuit. Understanding these concepts helps you diagnose electrical problems and ensure proper functionality.
Testing the Battery
The battery is the heart of your e-bike’s electrical system, providing the power needed to propel your ride. Regularly testing the battery helps ensure its performance and longevity. Here’s how you can test your e-bike’s battery:
Checking Battery Voltage
Using a multimeter, measure the voltage of your e-bike’s battery. Compare the reading to the manufacturer’s specifications to ensure it falls within the acceptable range. Deviations from the specified voltage may indicate a faulty or deteriorating battery.
Testing Battery Capacity
To test the capacity of your e-bike’s battery, charge it fully and then discharge it while monitoring the time and power consumption. Compare the results to the manufacturer’s specifications to determine the battery’s capacity. A significant decrease in capacity may indicate the need for a battery replacement.
Determining Battery Health
Battery health is a measure of its overall condition and performance. Regularly monitoring the battery’s voltage, capacity, and any signs of degraded performance can help determine its health. If the battery consistently fails to meet the manufacturer’s specifications, it may be time to consider replacing it.
Checking the Wiring and Connections
The wiring and connections of your e-bike’s electrical system must be in optimal condition for reliable operation. Regularly inspecting and testing them can help prevent electrical issues. Here’s what you can do:
Inspecting for Loose or Corroded Connections
Inspect all electrical connections for signs of looseness or corrosion. Tighten loose connections and clean corroded terminals using a wire brush or electrical contact cleaner. Properly secured and clean connections ensure uninterrupted electrical flow.
Testing Continuity
Using a multimeter, test the continuity of the wiring and connections. This ensures proper electrical conductivity without any breaks or interruptions in the circuit. Repair or replace any wires or connections that do not have continuity.
Repairing or Replacing Damaged Wiring
If you find any damaged wiring during your inspection or continuity testing, it is crucial to repair or replace it promptly. Damaged wiring can cause short circuits, power loss, or other electrical malfunctions. Use wire snippers and strippers to cut and strip the damaged wire, and then securely reconnect a new wire using proper crimping or soldering techniques.
Diagnosing Motor Problems
The motor is another critical component of your e-bike’s electrical system. If you encounter motor-related issues, follow these steps to diagnose and resolve them:
Testing Motor Functionality
To test the functionality of your e-bike’s motor, disconnect it from the controller and connect it directly to a power source. If the motor runs smoothly, the issue may lie within the controller or wiring. If the motor does not run or operates erratically, it may be faulty and require replacement.
Checking Motor Connections
Inspect the connections between the motor and the controller for any loose or damaged wiring. Ensure all connections are secure and properly insulated. Loose or damaged connections can cause motor malfunctions or power loss.
Replacing Faulty Motor Components
If you have determined that the motor is faulty, it may be necessary to replace specific components, such as brushes or bearings. Consult your e-bike’s manufacturer or a professional technician for guidance on replacing motor components or replacing the entire motor if necessary.
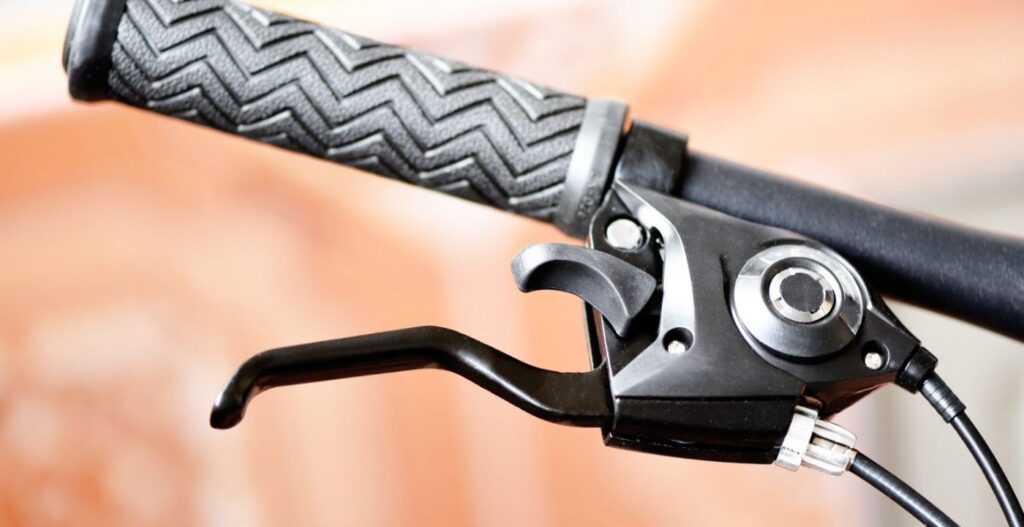
Troubleshooting Display or Controller Issues
The display and controller of your e-bike allow you to monitor and control its electrical system. If you encounter issues with the display or controller, try these troubleshooting steps:
Troubleshooting Brake Sensor Issues
If your e-bike’s display or controller does not respond when applying the brakes, check the brake sensors for any loose or damaged connections. Additionally, ensure that the brake sensors are properly aligned with the brake levers. Adjust or replace the sensors as needed to restore proper functionality.
Addressing Throttle Problems
If the throttle of your e-bike is unresponsive or functions erratically, start by inspecting the throttle connections for any loose or damaged wiring. Test the throttle with a multimeter to ensure proper voltage readings. If necessary, replace the throttle or consult a professional technician for further assistance.
Identifying and Resolving Charging Problems
If your e-bike does not charge properly or the battery does not hold a charge, start by checking the charger’s connections and ensuring it is compatible with your battery. Test the charger’s output voltage with a multimeter to verify it falls within the manufacturer’s specifications. If charging issues persist, consult a professional technician for a thorough diagnosis and repair.
Fixing Common Electrical Problems
Here are a few common electrical problems that e-bike owners may encounter and ways to address them:
Troubleshooting Brake Sensor Issues
If your e-bike’s brake sensors are not detecting braking or are engaging the motor while braking, check the brake sensors for loose or damaged connections. Adjust the position of the sensors to ensure proper alignment with the brake levers. If necessary, replace the sensors to restore proper functionality.
Addressing Throttle Problems
Unresponsive or erratic throttle behavior can be caused by loose or damaged connections. Inspect the throttle connections for any issues and test the throttle with a multimeter if necessary. Replace the throttle if it is deemed faulty.
Identifying and Resolving Charging Problems
If your e-bike’s battery does not charge fully or the charging process seems unusually slow, check the charger’s connections and verify its compatibility with your battery. If the charger is functioning correctly, but the battery still does not charge properly, it may be time to consider replacing the battery.
By following these troubleshooting steps and addressing common electrical problems promptly, you can ensure the optimal performance and longevity of your electric mountain bike. Regular preventive maintenance and attentive troubleshooting will keep you riding smoothly and safely on your e-bike for years to come. Remember that while some maintenance tasks can be performed at home, certain electrical issues may require professional assistance. Enjoy your e-bike adventure with confidence, knowing that you have the knowledge and skills to keep your electrical system running smoothly.

