
Hey there, E-Bike enthusiasts! Welcome to our “Advanced E-Bike Riding Tips” section, where we dive into the intricacies of e-biking. In this article, we will guide you through the process of setting up tubeless tires on your e-bike. Whether you’re a seasoned rider looking to enhance your riding experience or a beginner eager to learn more about your e-bike, this step-by-step guide will provide you with the necessary knowledge to make the switch to tubeless tires. So, let’s get started and discover the benefits and steps to set up tubeless tires on your e-bike!


How to Set Up Tubeless Tires on Your E-Bike
Hey there, E-Bike enthusiasts! Welcome to our “Advanced E-Bike Riding Tips” section, a dedicated space for riders who are ready to go beyond the basics. Our aim here is not just to introduce you to advanced riding techniques but also to guide you through intricate technical aspects of e-biking. Here you’ll find everything from advanced security measures to extreme uphill climbing techniques—content designed for those who are serious about e-biking and want to get the most out of their rides.
Target Audience
The target audience for this category is intermediate to advanced e-bike riders who have a strong understanding of e-bike components, safety measures, and basic riding techniques. These riders likely already use e-bikes for commuting, touring, or specific types of riding like mountain biking or cyclocross. They may even be involved in e-bike racing or long-distance touring. E-Bikes are complex machines with various functionalities, and there’s always room to learn and grow. Whether it’s optimizing for speed and efficiency or understanding the intricacies of regenerative braking, the depth of e-bike technology and techniques is vast. Each article should aim to be the go-to resource for its particular topic, presenting the reader with comprehensive, in-depth information that’s not easily found elsewhere.
Gathering the Required Tools and Materials
Before you begin setting up tubeless tires on your E-Bike, it is essential to gather all the necessary tools and materials. Here is a checklist of what you’ll need for the process:
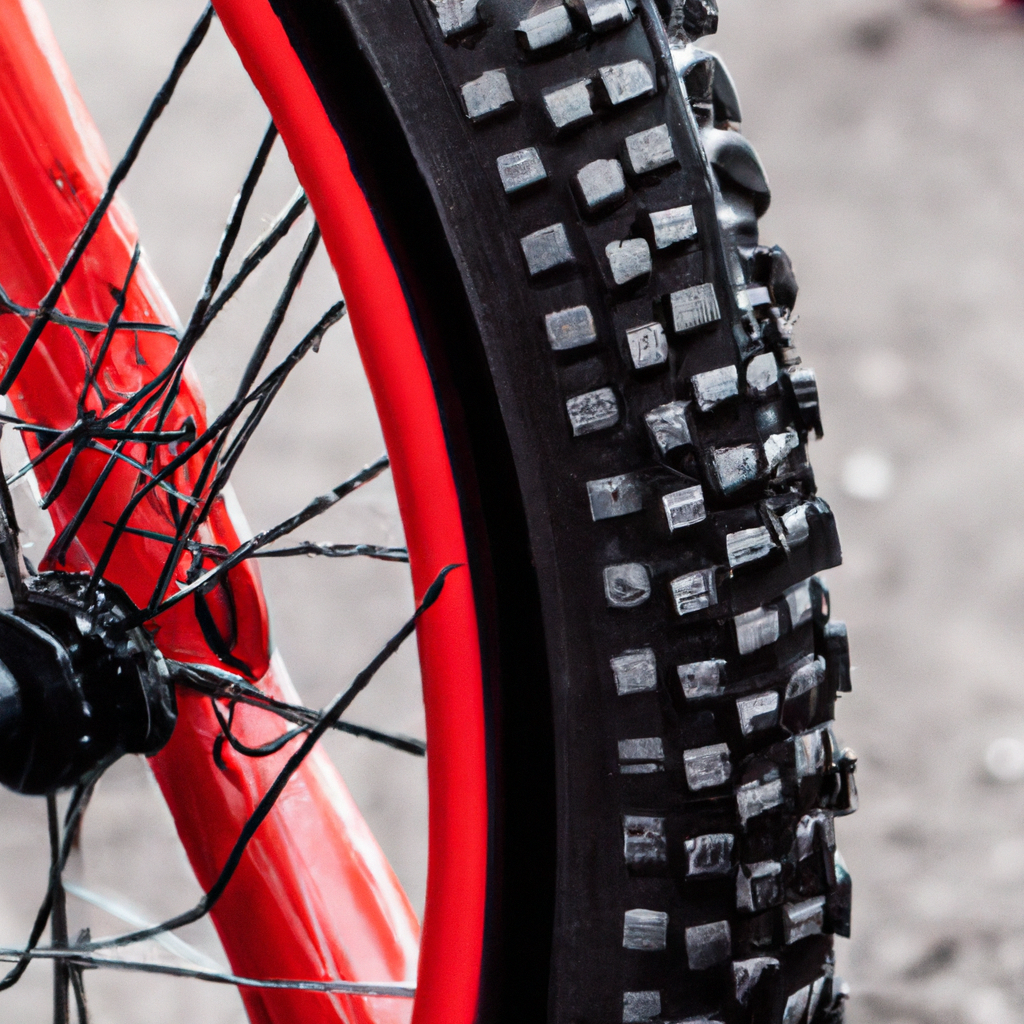
- Tubeless-ready tires: Ensure that the tires you have are specifically designed for tubeless setups.
- Tubeless rim tape: This specialized tape is used to seal the spoke holes on the rim.
- Sealant: A liquid sealant is applied inside the tire to seal any punctures or leaks.
- Valve stems: These are essential for allowing air to be pumped into the tire.
- Tire levers: These tools help you remove and install the tire onto the rim.
- Air compressor or a high-volume floor pump: You’ll need a reliable source of high-pressure air to seat the tire beads properly.
- Soap and water solution: This solution is used to detect and locate air leaks.
- Rim strip: In some cases, a rim strip may be necessary to cover the spoke holes and provide an extra layer of protection.
- Tire sealant injector: This tool allows you to conveniently add sealant to the tire.
- Tire sealant remover: In case of stubborn leaks or sealant build-up, a remover will come in handy for easy cleanup.

Preparing the Rim
Before mounting your tubeless-ready tires, it’s important to prepare the rim properly. Follow these steps to ensure a secure and effective setup:
- Clean the rim: Start by thoroughly cleaning the rim to remove any dirt, dust, or debris. This will help the tape adhere properly.
- Remove the existing rim strip: If your rim has a traditional rim strip, remove it carefully.
- Apply the tubeless rim tape: Apply the tubeless rim tape, ensuring it covers the entire rim bed. The tape should be wide enough to span the width between the rim’s inner walls.
- Ensure proper coverage of the rim bed: Take your time to apply the tape evenly, making sure it adheres securely to the rim. Use a tire lever or your fingers to press it down firmly.
- Apply a second layer of rim tape (optional): For added security, you can apply a second layer of rim tape. This is particularly useful for rims with larger spoke holes or if you desire extra protection against leaks.
Mounting the Tubeless-ready Tires
Once the rim is prepared, it’s time to mount the tubeless-ready tires onto the rim. Here’s a step-by-step guide to help you through the process:
- Inspect the tire for any damage or defects: Before mounting the tire, carefully inspect it for any cuts, punctures, or defects that may affect its performance. It’s better to identify any issues beforehand and replace the tire if necessary.
- Install the valve stems: Insert the valve stems through the rim’s valve hole, ensuring they are securely in place.
- Insert one side of the tire onto the rim: With the valve stems facing up, start by inserting one side of the tire onto the rim. Use tire levers if necessary, but be cautious not to damage the tire or rim.
- Add an appropriate amount of sealant: Using the sealant injector, add the recommended amount of sealant into the tire. Refer to the manufacturer’s instructions for the correct quantity.
- Mount the other side of the tire onto the rim: Once the sealant is in place, carefully mount the other side of the tire onto the rim. Again, use tire levers if needed, but be gentle to avoid pinching the tire or damaging the rim.
- Ensure the tire beads are properly seated: With both sides of the tire mounted, gently inflate the tire to about 20-30 psi. Check all around the tire to ensure both tire beads are fully seated onto the rim.
- Confirm air retention by sealing any air leaks: If you notice any air leaks around the tire beads, deflate the tire and then reinflate it while pressing down on the tire beads. This will help seal the tire properly and prevent any air from escaping.

Seating the Tire Beads
Seating the tire beads securely onto the rim is crucial for a successful tubeless setup. Here are some methods you can use to achieve proper tire bead seating:
- Use a high-volume floor pump or air compressor: Inflate the tire rapidly using a high-volume floor pump or an air compressor. The force of the air entering the tire should help seat the tire beads.
- Utilize a tire bead setter: In some cases, a tire bead setter can be used to create a burst of air pressure that quickly seats the tire beads into position. This tool can be especially helpful for stubborn tires that are challenging to seat.
- Create a seal by temporarily removing the valve core: In certain situations where tire beads won’t seat, temporarily remove the valve core to allow a higher volume of air to rush into the tire. Once the tire beads are seated, reinstall the valve core.
- Inflate the tire to the recommended pressure: Once the tire beads are seated, inflate the tire to the recommended pressure specified by the tire manufacturer. This information can usually be found on the tire sidewall.
- Inspect for proper seating of both tire beads: Carefully examine the tire to ensure both tire beads are evenly seated along the rim’s edge. A visible line should form at the edge where the tire meets the rim, indicating a secure and proper seating.
Checking for Air Leaks
After seating the tire beads, it’s crucial to check for any air leaks that may compromise the tubeless setup. Here are a couple of methods to detect air leaks:
- Inspect the tire for leaks by listening and feeling for air escaping: Start by listening and feeling around the tire for any noticeable air leaks. A hissing sound or feels of air escaping can indicate a leak.
- Submerge the tire in a tub of soapy water: Prepare a solution of warm soapy water and submerge the tire, ensuring it is fully immersed. Rotate the tire in the water and observe for any bubbles forming. The bubbles indicate the location of an air leak.
- Identify and mark any leaks: Once you identify a leak, mark the location using a marker or tape. This will help you accurately address the leaks later on.
- Rotate the tire to ensure all areas are checked: Rotate the tire in the water, systematically checking all areas for potential leaks. Taking your time to thoroughly inspect the tire will help identify any hidden leaks and prevent future issues.

Sealing the Leaks
When leaks are detected, it’s important to seal them to ensure a reliable tubeless setup. Here’s a step-by-step process to seal the leaks effectively:
- Rotate the tire to position the leaks at the bottom: Rotate the tire so that the marked leaks are positioned at the bottom. This will make it easier to address and repair the leaks.
- Apply sealant through the valve stem using an injector: Using the sealant injector, apply sealant directly into the tire through the valve stem. Inject an appropriate amount of sealant to effectively seal the leak. Remember to refer to the manufacturer’s instructions for the recommended quantity.
- Utilize a tire sealant remover for stubborn leaks: For stubborn or larger leaks, a tire sealant remover can be used to clean out the sealant and reapply a fresh layer. This process may need to be repeated a few times until the leak is effectively sealed.
- Continue rotating and injecting sealant until all leaks are sealed: Rotate the tire to different positions, injecting sealant into each leak point until all leaks are sealed. Take your time and be thorough to ensure a reliable and airtight tubeless setup.
Fine-tuning the Tire Pressure
Once the tubeless setup is complete, it’s important to fine-tune the tire pressure to suit your riding preferences and the terrain you will be riding on. Here are some guidelines to help you:
- Determine the manufacturer’s recommended tire pressure: Refer to the tire manufacturer’s guidelines or check the tire sidewall to find the recommended tire pressure range. This range will give you a starting point for adjusting the tire pressure.
- Adjust the tire pressure based on riding preferences and terrain: Consider your riding style, weight, and the type of terrain you’ll be riding on. Some riders prefer higher pressures for smoother and faster rides, while others prefer lower pressures for more traction and control on rough terrain.
- Experiment with different pressures to find the ideal balance: Start with the manufacturer’s recommended pressure and experiment with slightly higher or lower pressures to find the ideal balance for your riding style and terrain. Keep in mind that tire pressure can affect your bike’s handling and performance, so take your time to find what works best for you.

Regular Maintenance and Inspections
To ensure optimal performance and longevity of your tubeless setup, regular maintenance and inspections are essential. Here are some important steps to follow:
- Check tire pressure before every ride: Before each ride, check the tire pressure to ensure it is within the desired range. Adjust the pressure if necessary to optimize performance and grip.
- Inspect the tire for damage, cuts, or punctures: Regularly inspect the tire for any signs of damage, cuts, or punctures that may compromise its integrity. If you notice any issues, address them promptly to prevent further damage.
- Replenish sealant as necessary: Over time, the sealant inside the tire may dry out or lose its effectiveness. Check the sealant levels periodically and add more if needed. Follow the manufacturer’s recommendations on when to replenish the sealant.
- Replace the tire if necessary: If the tire becomes excessively worn, damaged, or if it fails to hold air despite repeated attempts to seal leaks, it may be time to replace the tire. Riding with a compromised tire can affect your safety and performance, so be sure to install a new tire when needed.
Tips for a Smooth Setup Process
To ensure a smooth and hassle-free tubeless tire setup, consider these helpful tips:
- Use warm soapy water for easier tire installation: When mounting the tire onto the rim, applying warm soapy water to the tire beads can help make the process smoother. The lubrication provided by the soapy water reduces friction and facilitates easier tire installation.
- Be patient during the tire seating process: Seating the tire beads can sometimes be a bit challenging, especially with certain tire and rim combinations. Take your time and be patient during this process, as rushing could lead to improper sealing and potential air leaks.
- Invest in a quality sealant for better performance: Choosing a high-quality sealant can significantly impact the performance and reliability of your tubeless setup. Look for sealants that are known for their effectiveness in sealing punctures and providing long-lasting protection.
- Consider using additional rim tape for added protection: If your rim has larger spoke holes or if you’re looking for extra protection against air leaks, consider using additional rim tape. This provides an extra layer of seal and minimizes the risk of leaks.
- Consult product manuals and online tutorials for specific instructions: Different tire and rim combinations may require specific techniques or steps to achieve a successful tubeless setup. Refer to product manuals, manufacturer’s guidelines, and online tutorials for detailed instructions tailored to your specific setup.
By following this comprehensive guide, you’ll be able to set up tubeless tires on your E-Bike effectively. Tubeless setups offer a range of benefits, including increased traction, reduced weight, and improved puncture resistance. With the right tools, materials, and techniques, you’ll be ready to hit the trails with confidence and enjoy a smoother and more efficient ride on your E-Bike. Remember to perform regular maintenance and inspections to ensure your tubeless setup remains in optimal condition. Happy riding!
